
People constantly tell me how they would love to be able to sew. That means a lot of different things to different people - but like learning anything else, you just have to take the first step. That's what I'm here for.
Like taking up anything new, everyone worries that it'll cost money. Plenty of people buy 'basic' sewing kits that are anything but - they're frequently filled with too much of what you'll never need, and too little of what you will. The end result just confuses the beginner, and means these things usually end up as a tangled mess of threads down the back of a wardrobe.
Now, a note on machines: This blog is not intended to explain your machine to you. For that, you can read the manual, or if you prefer, I offer home tutorials for this very purpose. Although I will include projects that are made infinitely easier by having a basic home sewing machine (and knowing how to use it to sew in a straight line), this starter kit can see you through anything.
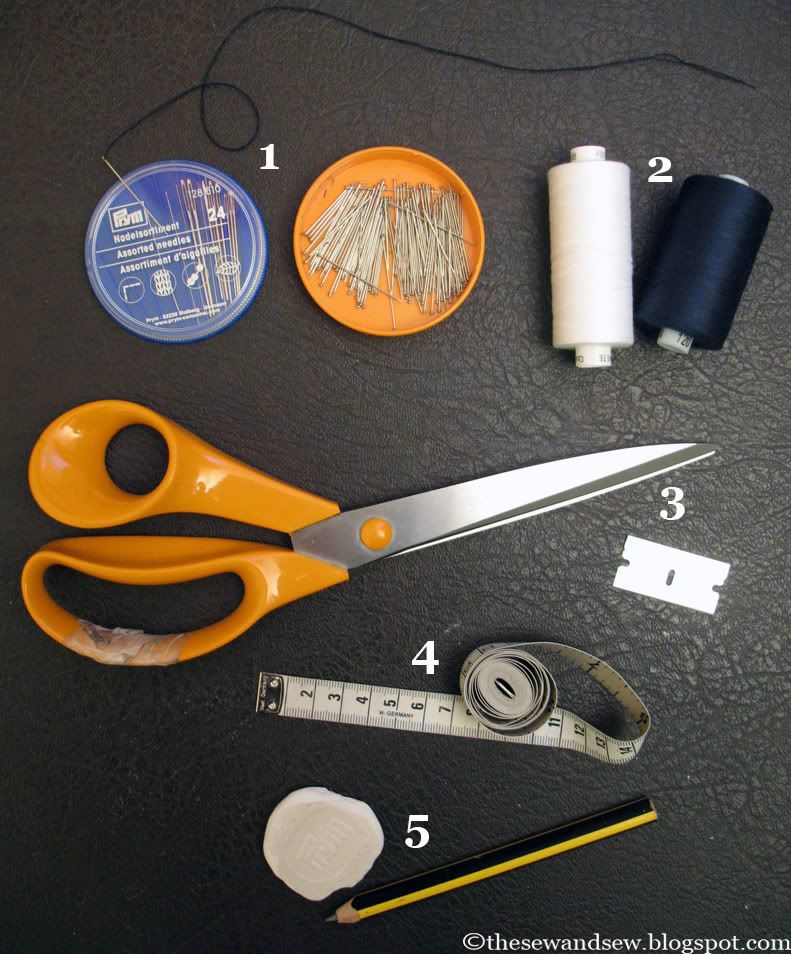
So here it is - this is the kit I take with me where ever I go. And it's all you need to get started.

Number 1: Needles & Pins (great, now I'll have The Ramones in my head all day...)
One small pack of assorted needles. What do I mean by 'assorted'? Well, thinner needles for thinner fabrics, thicker (stronger) needles for thicker fabrics. A thick needle in a fine fabric will leave a noticeable hole. Needles will have a small eye (the hole at the top where you send the thread) for fine threads, and a larger eye for things like thick darning threads or embroidery. So, an assortment is the best way to go. The one pictured here is handy, because the different sizes don't get mixed up.
One pack of pins. Get the pearl-tipped ones (with a kind of ball at the top) if you find them easier to handle.
Please, please, PLEASE don't bother buying dirt-cheap pins. They will be blunt, end of story. You won't be able to get them through thick fabrics, and they'll wreck thin ones with ladders and thread-pulls. A pack of good quality (eg: Pony) pins will only cost a couple of euro anyway, and will save you no end of headaches.
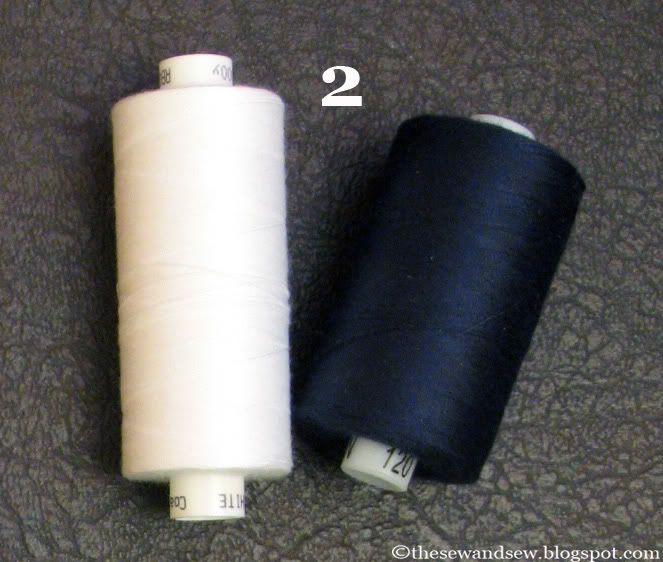
Number 2: Threads
Pretty obvious, this one. But a couple of things to bear in mind all the same.
For an easy life, only buy 100% polyester threads. This is one area of sewing where it's best to go with synthetics - cotton thread, or polycotton (a mix of polyester and cotton) will shrink in a hot wash cycle, and all your careful stitching will pucker.
Instead of having tiny amounts of every colour under the sun, just start with one black and one white. Keep. It. Simple.
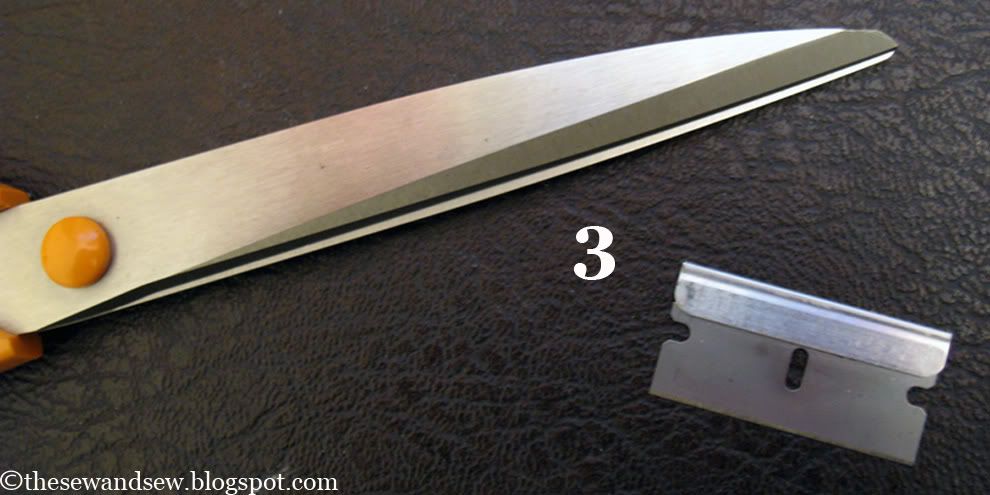
Number 3: Scissors & Blade
A fairly decent fabric scissors will set you back about five euro. Ones that can be re-sharpened (like the one pictured) will start around twenty euro, but here's the thing - unless you're doing semi-professional quantities of fabric cutting, why would you need to re-sharpen? One reason, and generally, one reason only. You've used it to cut something other than fabric. Paper, plastic, and anything other than fabric will blunt your scissors immediately. Get a different cheap scissors for chopping household junk - and keep your fabric scissors for fabric.
The blade pictured is an old-fashioned razor blade, properly called a Bohemian blade. They are mostly useful for undoing seams - letting down hemlines, or letting out clothes, or just undoing a line of stitching that went wrong. A seam ripper tool will do the same job, but I find these much easier to handle. Plus, they only cost 25c in the pharmacy.
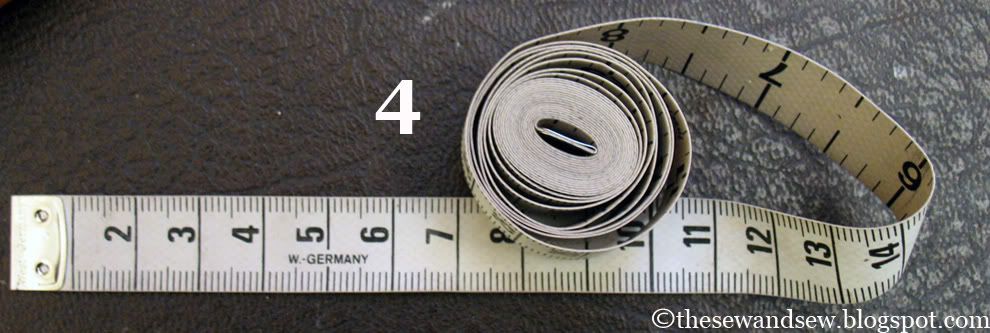
Number 4: Measuring Tape
Called a 'soft' or 'dressmakers' measuring tape, because it's, well, soft. As opposed to the kind of measuring tape you get in the hardware aisle, which is pretty useless for alterations.
No need to get anything very long, a 60 inch/150cm tape is fine for most people. It's handy to have metric on one side and imperial on the other, but that's up to you.
Almost every house in the world has one of these tucked away somewhere. This one belonged to my Nan originally. Eagle-eyed readers will note that it's been a while since there was a 'West' Germany.

Number 5: Chalk & Pencil
These are for marking fabric - your sewing will be vastly improved by first marking where you want to sew. If you're using patterns for dressmaking, you'll use the tailor's chalk to first mark the outline. It's usually available from any shop selling sewing supplies, and shouldn't cost much more than a euro. The pencil isn't essential, but I find it easier with light coloured fabric to just mark a little on the inside with a thick, soft pencil.
At a pinch, regular chalk will do. You just want something that won't stain and will wash or brush out later.
At a total pinch, you can mark your hemlines and alterations using pins, but especially if you're just starting, I thoroughly recommend marking first.
If you haven't got these things lying around your house already, ask around. Sharp pins, needles, and scissors are completely essential, but everything else can usually be scavenged, or rescued from the dark corners of every house where abandoned projects lie.
Keep them together somewhere, in a bag or a small box, so you always know where they are when you need them. And keep a needle threaded for those buttons that invariably fall off, just as you're leaving the house.
Next Post: The right way to sew on a button.